User Manual - Administration Console
EXPECTED USE
The Administration Console is designed specifically for the management of accounts and user groups that will interact with the services provided by NOSWORK based on the characteristics of the plan selected for use.
This document is a guide for using the Administration Console application. Through its content, the user who interacts with the application will learn to work with the different functionalities that make it up.
NOSWORK Management Console
Access to the system
The interface (Figure 1) shows the access control area for administrator-type users. To do this, the User must be entered, the Password of the user who will access the system and the captcha code correctly entered. Once the data has been entered, click on the Enter button.
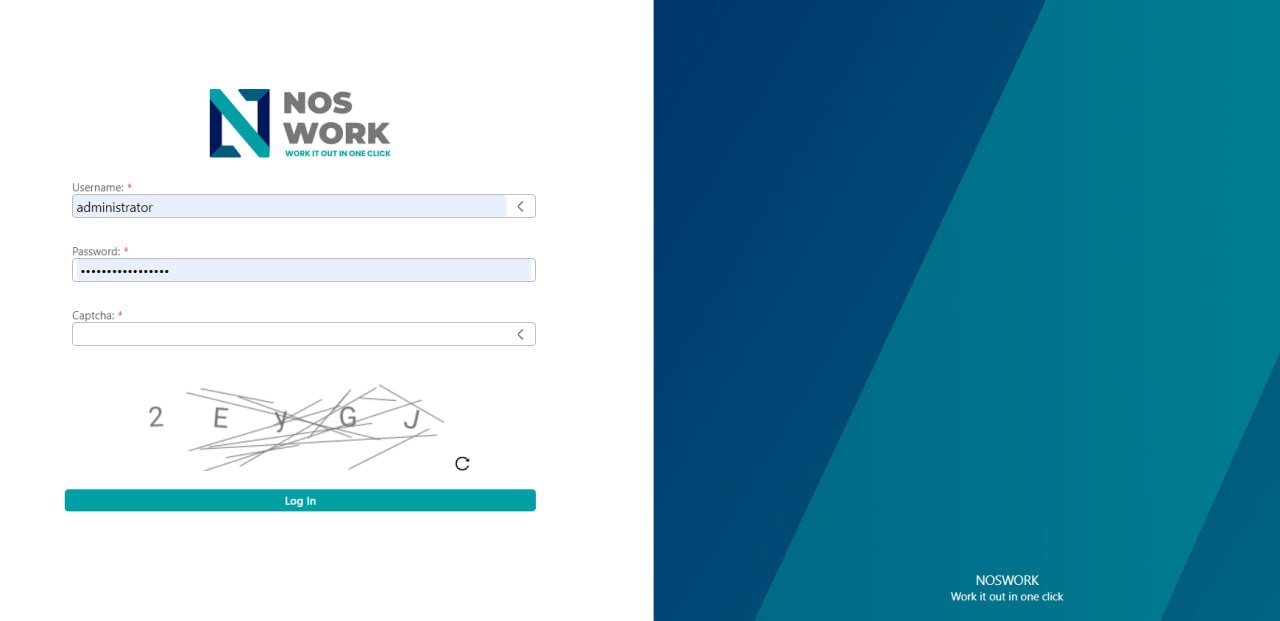 Figure 1 Login
1. Description of the system main page.
Figure 2 shows the main interface of the System Administration Console. It shows the elements that make up the link menus, lists and action buttons of the system. By default, the Users link is selected, which shows the list of all users created in the system. Upper banner: In the upper banner is the system banner in which the system identifier and the data of your authenticated user are displayed. Left side menu: in the menu you will find access to the user management, group management and conFiguretion links. Data display form: form where the data relating to the selected link in the side menu and the action buttons on the elements found in the form.
 Figure 2 Home Page/User List
1.1 Menú de enlaces

Figure 3 Menu
1.2 Link to Users
When accessing the Users link in the menu, the list of users created in the menu is displayed. system (See Figure 3).
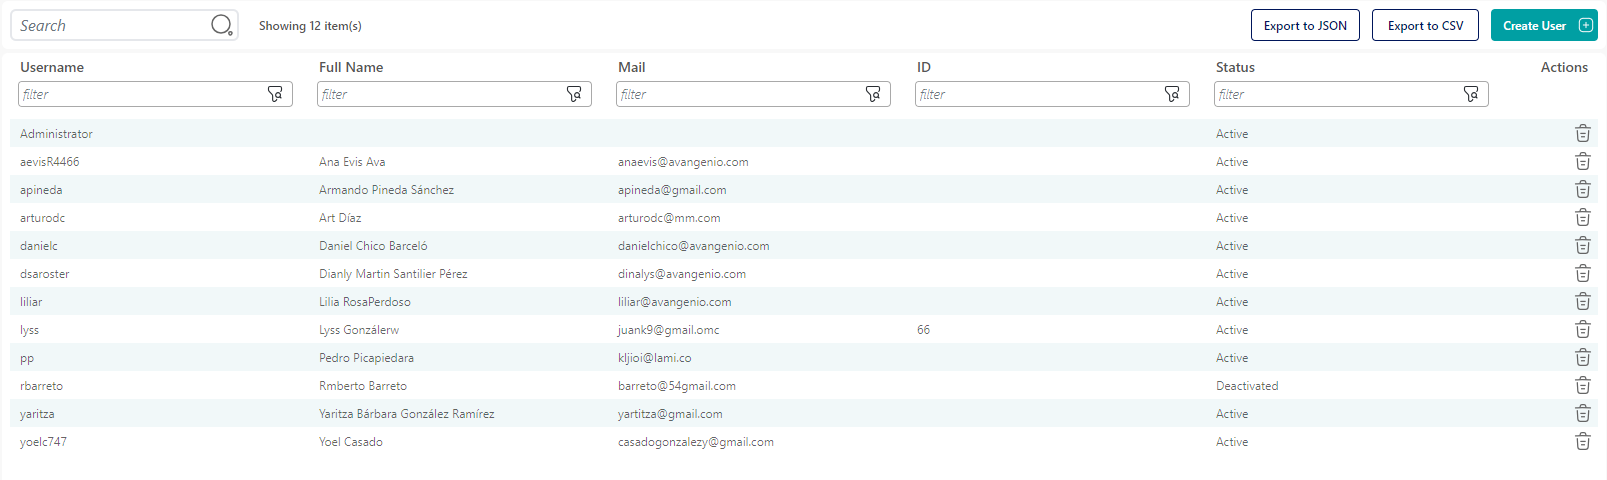 Figure 4 List of users
Figure 4 shows the list of all the users created in the system, as well as the Export to JSON buttons that allow the user to download the list of users in a file with .json format, the Export to CSV button that allows the user to download in a .csv file (Excel), and a general search field (filter) and specific search fields (See Figure 5 ) are displayed for details of the user which when entering values in them the results that match the applied search criteria are displayed (See Figure 5).
 Figure 5 Filters
In addition, the Create user button is displayed , which when selected shows the user the form that allows them to enter the data necessary to create a new user.
1.2.1 Creter user
In the Group List window, when the user selects the Create Group button , the system displays the form to collect the data of the new user to be added (See Figure 6).
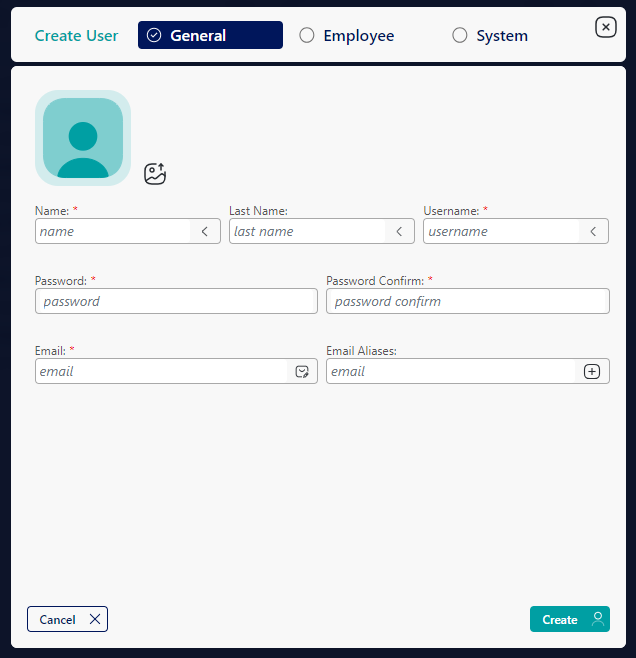
Figure 6 Create users/General Data
Once in the Create User form, if the user selects the Cancel option , the system returns to the User List view.
If you mark the Employee field at the top of the form, the system displays the data to be filled out regarding the user as an employee (See Figure 7).
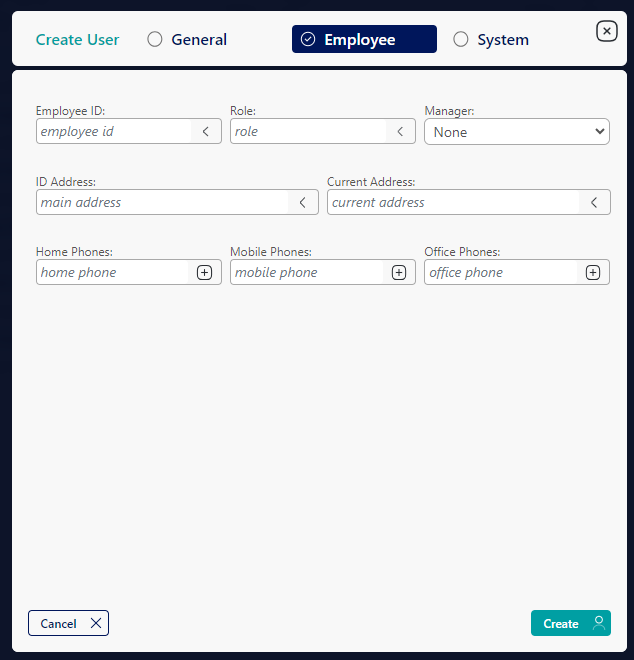
Figure 7 Create user / Employee data
If the user selects the System field , they are shown the data regarding their account password, Mac address of their PC and whether they belong to any group (see Figure 8).

Figure 8 Create user/System data
Once the mandatory data has been entered, if the user selects the Create button, the system closes the form and a message is displayed informing that the user was successfully created (See Figure 7) and returns to the My profile view.

Figure 9 Informational message
1.2.2 Edit user
In the User List view, if the user selects an item from the list, the system displays the Edit User form (See Figure 10).
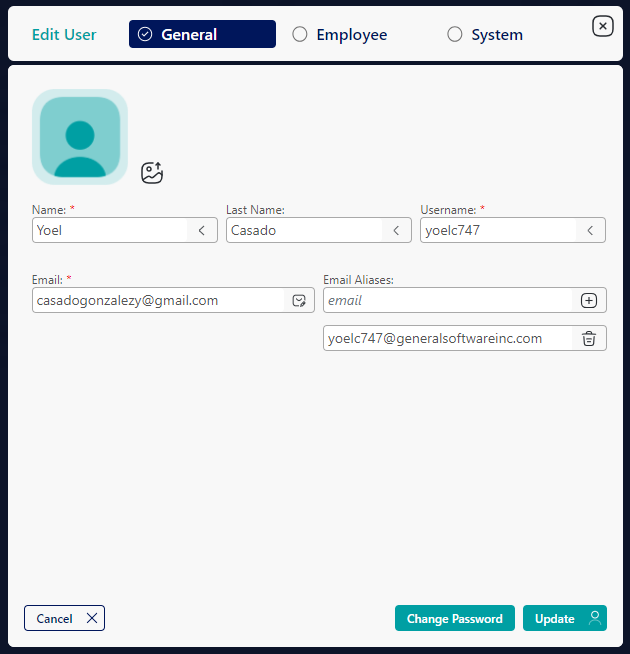
Figure 10 Edit user
Once in the form to edit the information, if the user selects the Cancel option the system returns to the User List view.
If the user selects the Change Password button, the system displays the form to change the password of the selected user (See Figure 11).
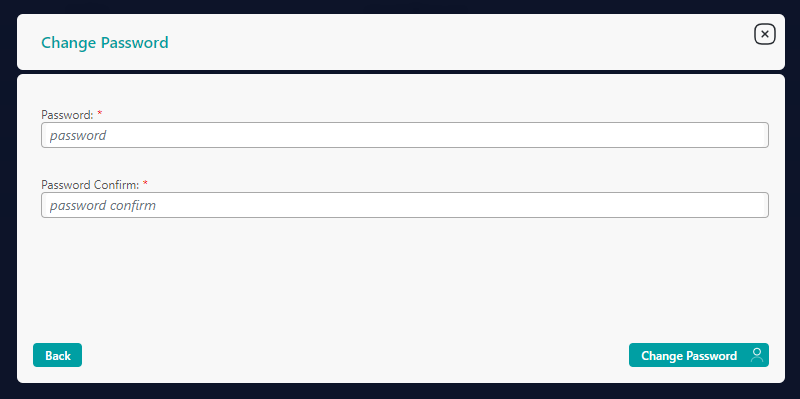
Figure 11 Edit user/Change password
While in the Change Password form, if the user selects the Back option, the system returns to the Edit User Information form.
Once the information to change the password has been specified, if the user selects the Change password option, the system once the password has been updated, a message is displayed informing that the password was changed successfully (See Figure 12).

Figure 12 Informational message
Once the data has been modified, if the user selects the Update button, the system, once the data has been updated, displays a message informing that the update was carried out successfully (See Figure 13) and returns to the My profile view.

Figure 13 Informational message
1.2.3 Delete user
In the User List view, if the user selects the Delete User option , the system displays a pop-up window to confirm the operation (See Figure 14).
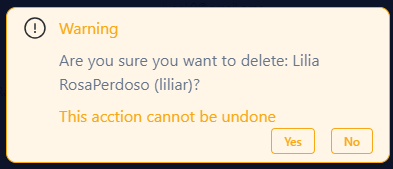
Figure 14 Delete user/Confirmation message
Once in the confirmation message to delete the user, if the user selects the No option the system returns to the User List view.
If the user selects the Yes option, the system deletes the user and displays the successful deletion information message (See Figure 15) and returns to the User List view.

Figure 15 Informational message
1.3 Link to Groups
When accessing the Groups link, the action buttons and general and specific filtering fields for the details of each group are displayed, as well as the buttons to export the list of groups in JSON and CSV format.
Additionally, the list of groups created in the system is shown (See Figure 16) and the buttons to Manage members and Delete groups.
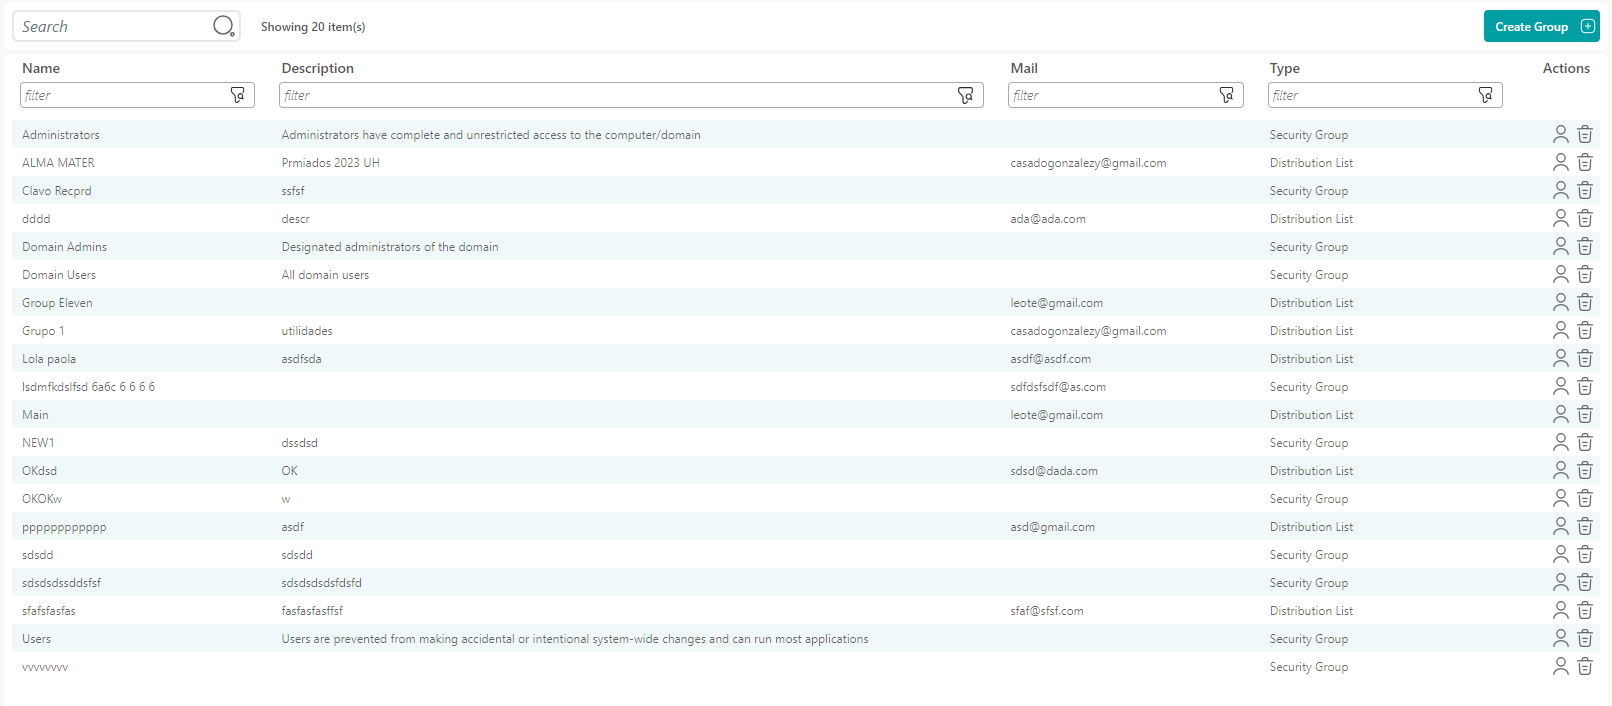 Figure 16 Groups
Additionally, the Create group button is displayed, which when selected displays the form that allows the user to enter the data of the new group that they want to add.
1.3.1 Create group
Once in the User List, the Create group button is selected , which displays the form that allows the user to enter the data of the new group they want to add (See Figure 17).
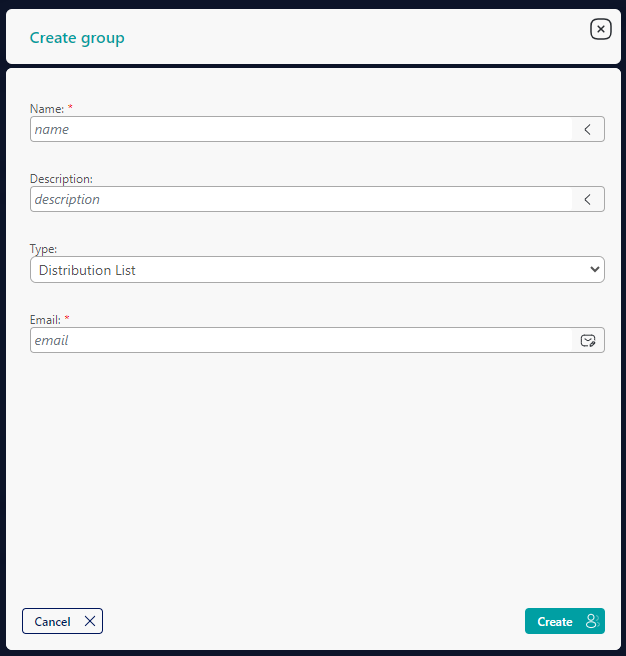
Figure 17 Create new group
Once in the form to Create the new group, if the user selects the Cancel option , the system returns to the Group List view.
Once all the data that is mandatory regarding the new group has been specified and the user selects the Create button (See Figure 18).

Figure 18 Information message
Also in the list of groups the Manage Members and Delete Group buttons are displayed .
1.3.2 Manage members
In the Group List window (See Figure 6), the user selects the Manage Member button , the form is displayed with the list of users who belong to the selected group and a field to search and add other users, as well as the button to delete the member. member you want. (See Figure 19).
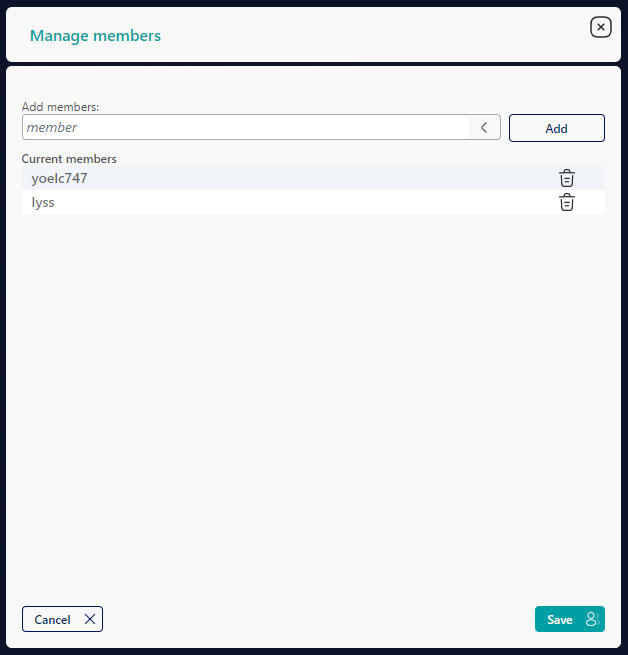
Figure 19 Manage group members
Figure 19 shows the form where the search field for users to be added to the group, the button to add said filtered users and the list of members who already belong to the group are located.
Once in the form to manage the members of a group, if the user selects the Cancel option , the system returns to the Group List view.
Once the actions of adding or deleting group members have been carried out, if the user selects the Save option and the changes are saved correctly, a message is displayed informing that the group members were successfully updated (See Figure 20).

Figure 20 informational message
1.3.3 Delete group
In the Group List window (See Figure 6) the user selects the Delete group button, the system displays a pop-up window to confirm the operation (See Figure 21).
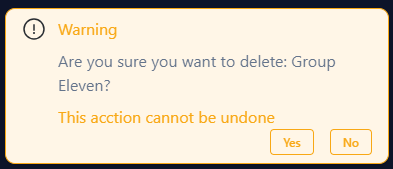
Figure 21 Delete Group / Confirmation Message
Once in the confirmation message to delete the group, if the user selects the No option , the system returns to the Group List view (See Figure 6).
If the user selects the Yes option, the system deletes the group, displays the successful deletion information message (See Figure 22) and returns to the Group List view.

Figure 22 Informational message
1.4 Link to Settings
When accessing the Settings link, the view is displayed to select the user's preferred language (See Figure 23). (Spanish English).

Figure 23 Settings
1.4.1 Change language
Figure 23 in the Account Settings view shows the Selection type field where the different languages that the user can select to view the information in their account are shown (See Figure 24).
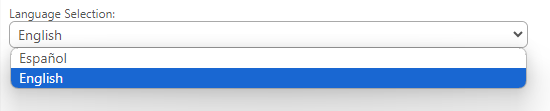
Figure 24 Settings/Select languages
1.5 Link to System Logs
When accessing the Logs link , the record of all operations carried out by users in the system is displayed (See Figure 25).
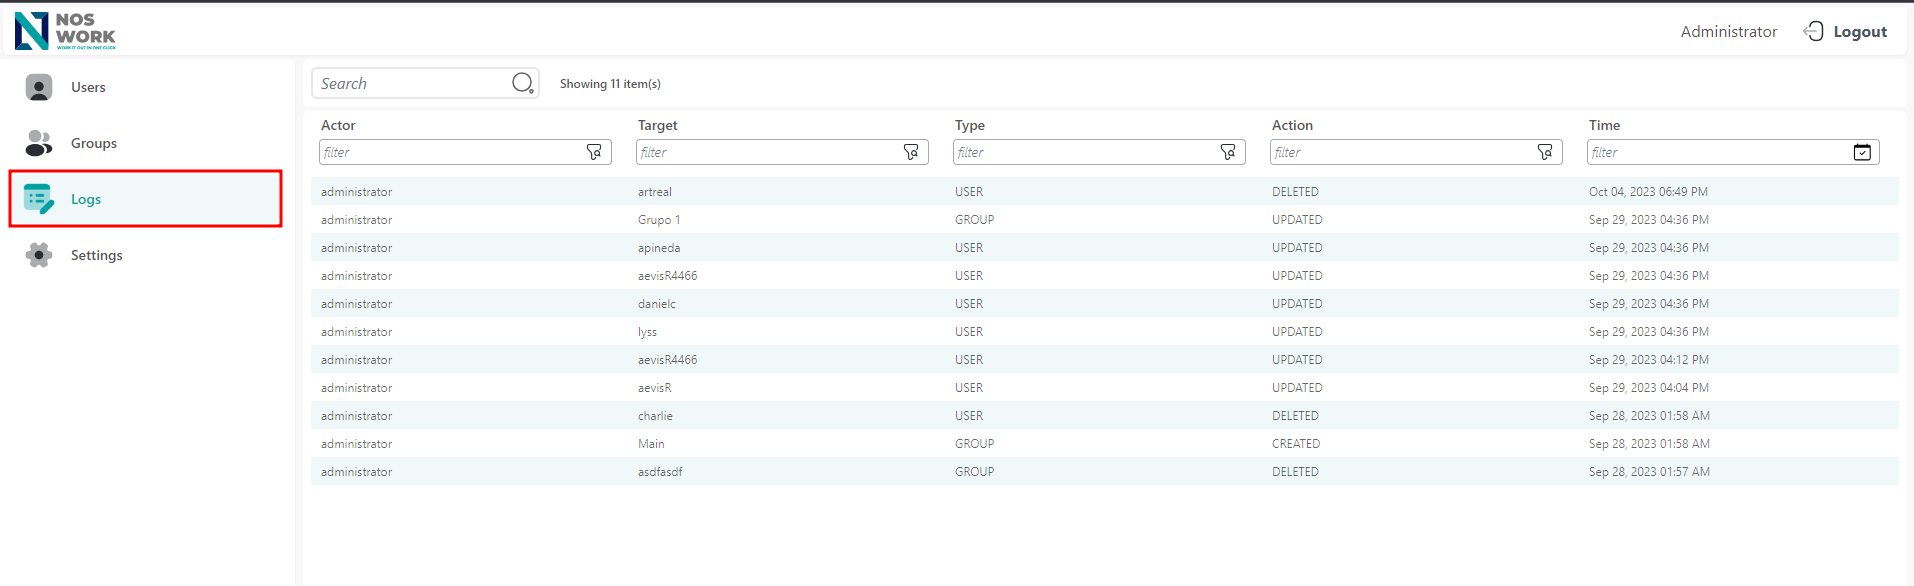 Figure 25 System logs
The records are displayed structured by user name that made the modification, modified element, element type, action performed on the element, and the date and time the action was performed.